It’s fat Tuesday, y’all! How better to celebrate than with my mama’s recipe for fried chicken. I want to start by saying how hard it was to make this “recipe”. I’ve never measured anything when frying chicken before. So, it was a stretch to measure EVERYTHING. Man was it worth it, though! Recently, I had asked readers what classic recipe they would like to learn to make. I was surprised to see an astounding number of requests for fried chicken! I guess, I just took for granted that everyone’s mama made it!
This is the epitome of comfort food and growing up, we NEVER had fried chicken without two very specific sides. You got mashed potatoes and gravy and canned corn. No if and or buts about it! We aren’t that rigid here… we had yams and broccoli. I would be lying if I said it was as comforting. It was delicious, but those sides come with nostalgia.
My number one tip for chicken it to be patient. Don’t turn it too quickly and don’t turn the heat up to speed along the process. Take your time and plan to spend a stretch at the stove babysitting your chicken. Good music and a glass of wine should help you pass the time. I use a large skillet, my mom prefers her electric skillet. The electric skillet is good for frying, it’s deep and has even heat and is easy to temperature control. It’s also something that needs to be stored. I’m limited on space and I don’t do much frying so, it’s not for me.
You will need the following:
- About 4lbs chicken. Bone in, skin on. I like wings and drumsticks. 4lbs equalled about 8 drumsticks and 14 wings.
- 2 cups all purpose flour
- 3 Tbsp. salt plus more for salting raw chicken
- 3 Tbsp garlic powder
- 2 Tbsp ground black pepper
- 2 tsp paprika
Directions:
- Place all dry ingredients in a gallon sized ziploc bag and mix thoroughly. This is important taste the flour. I know it’s not the most appetizing thing in the world, and it’s not going to be delicious, but you need to taste it to know if the flavors are right. At this point, you can add more of an ingredient to balance out the taste to your liking.

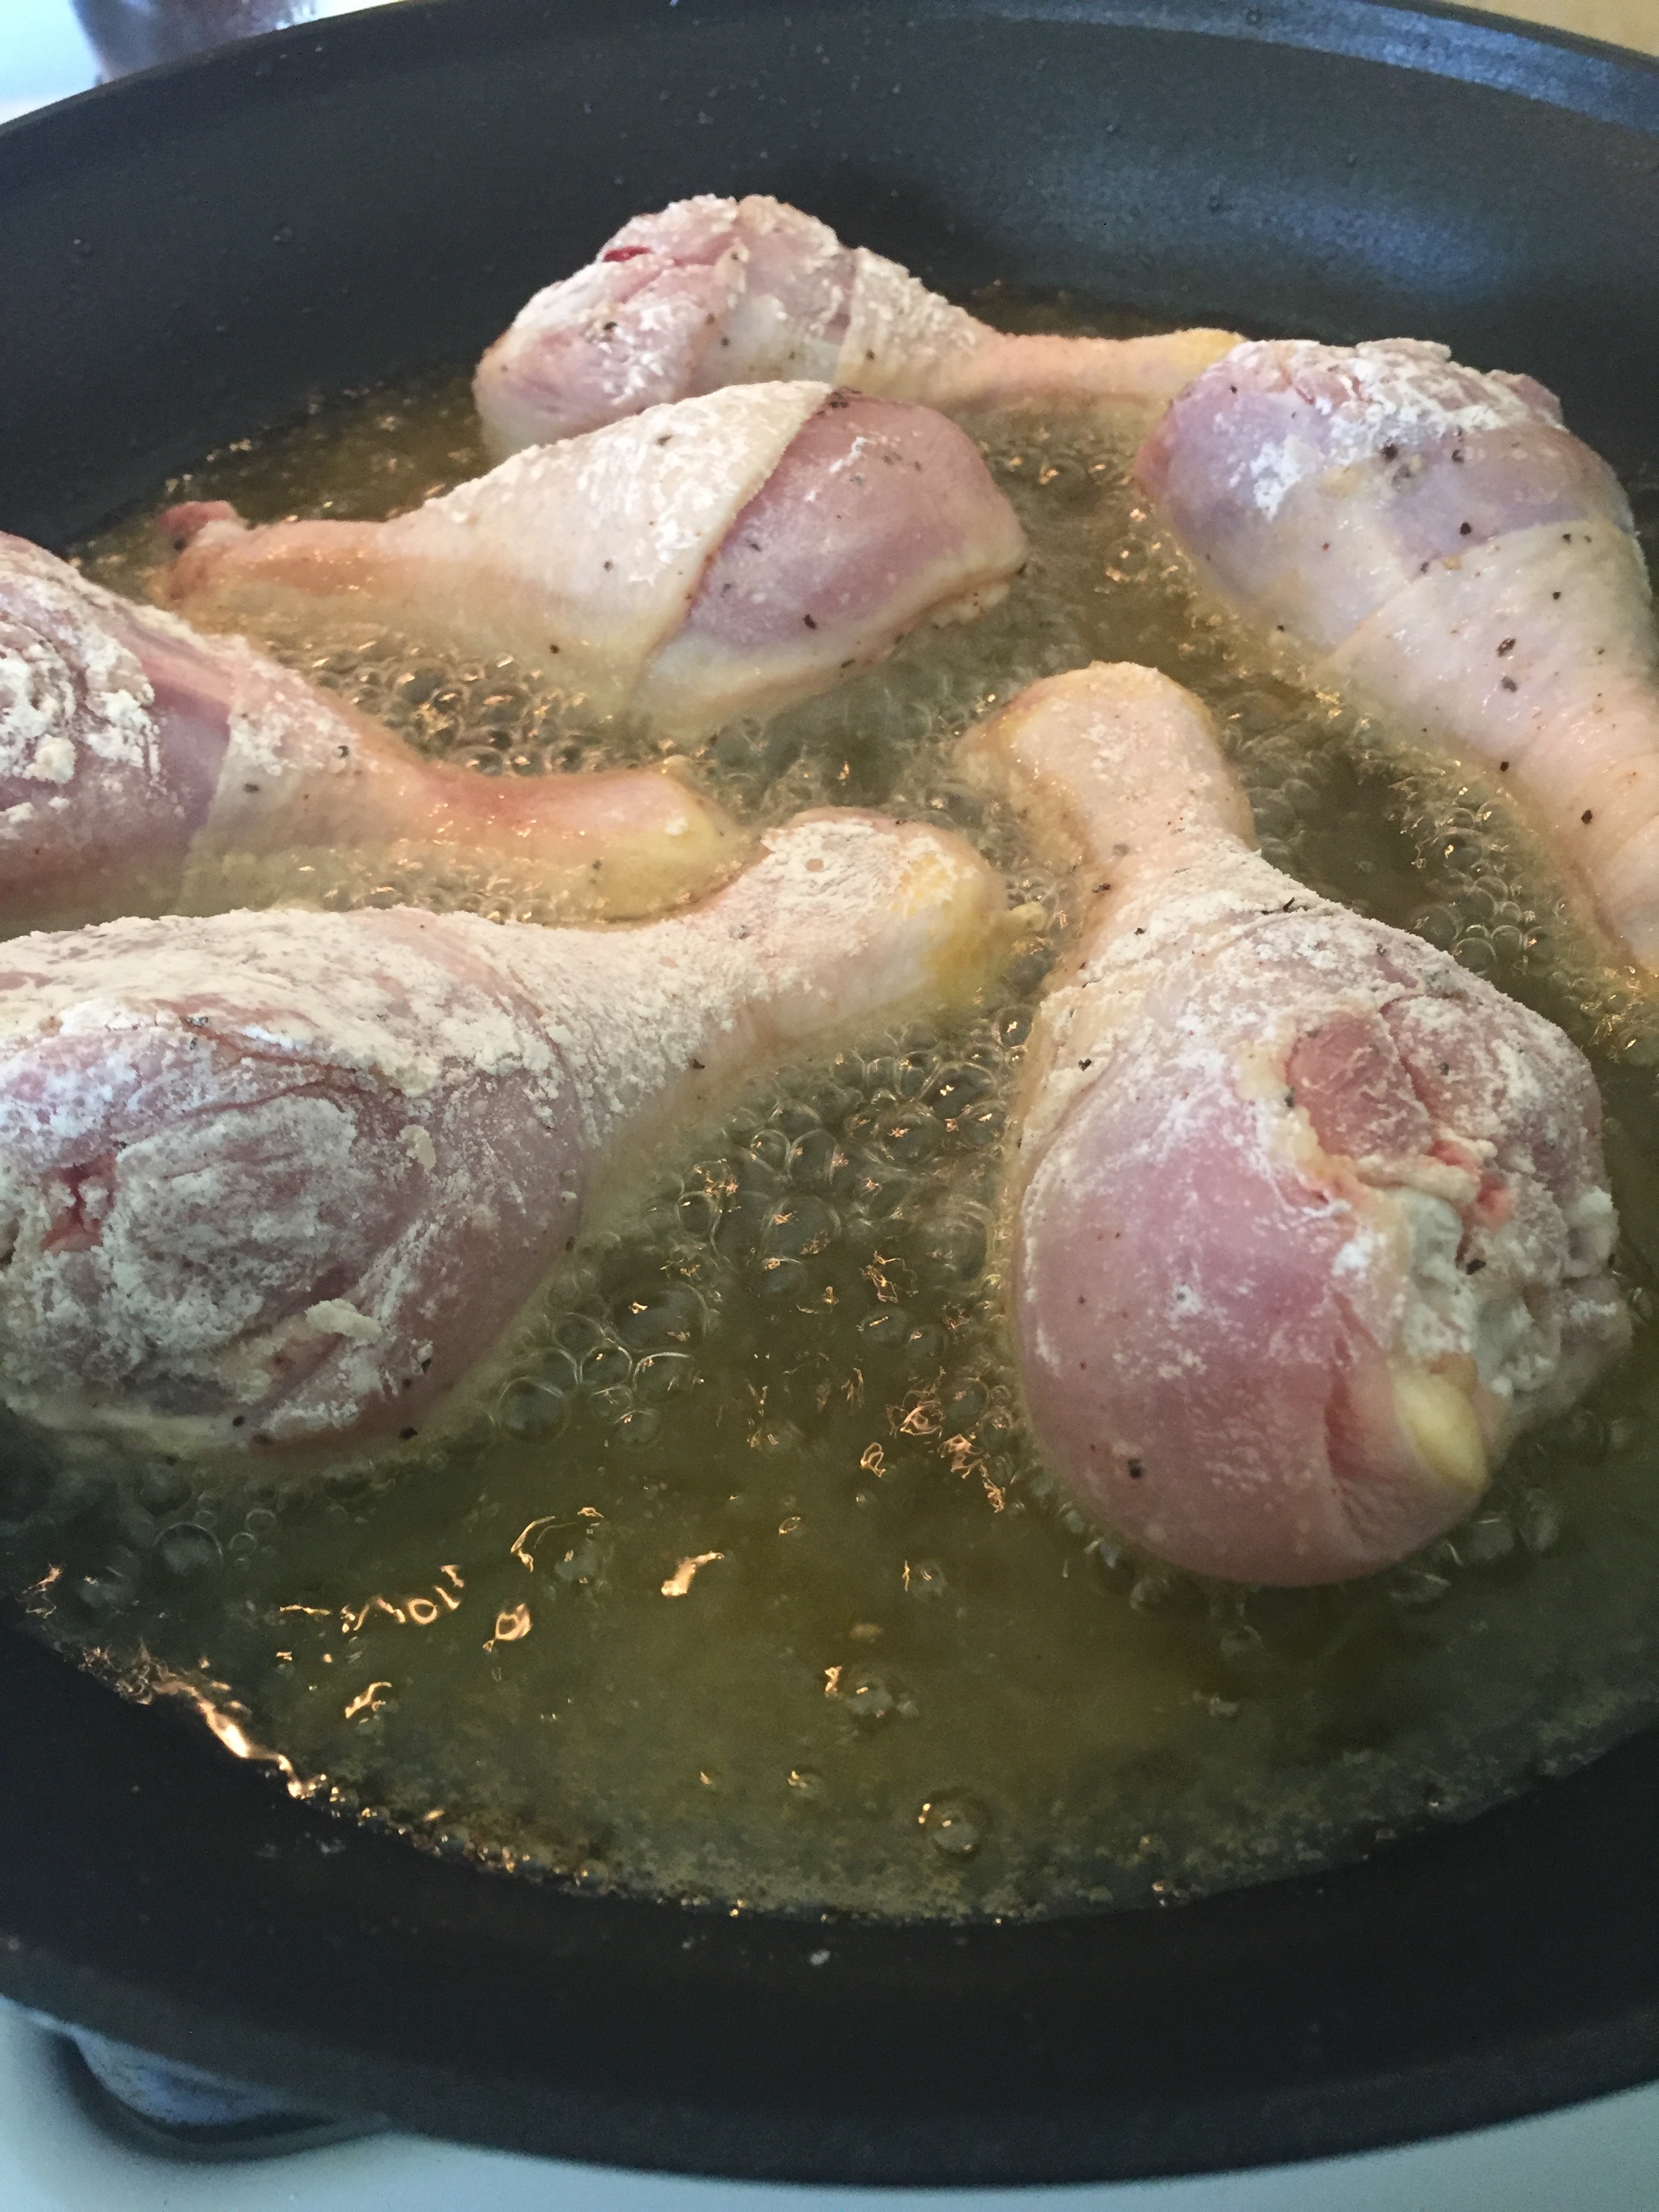
- Lightly salt and pepper the chicken pieces. Next, toss five or six pieces into the ziploc flour mixture and seal the bag. Toss it around until each piece is completely coated. Remove a piece at a time shaking excess flour off as you go. Lay them on a platter or baking sheet and prepare to fry!
- Heat about a half inch of vegetable oil in a large skillet over medium heat. Oil is ready to fry when you drop a pinch of the flour mixture into it and it sizzles immediately.
- Gently place chicken pieces into the oil, leaving an inch or so between pieces. Then, leave them alone! It took 8-10 minutes per side before they were ready to flip. Don’t rush it. When you turn them, they should be a beautiful golden brown.

- Once done, remove from skillet to a paper towel lined platter or baking sheet and place in a warm oven until you’ve fried all the pieces and are ready to serve.

BOOM! That’s my mama’s fried chicken and it’s gooo-oood! (said in my best Andy Griffith voice). Obviously, we aren’t eating fried chicken every day but for a special occassion, fry some up! When you do, make a little extra because this chicken is AHHHH-MAZING the next day, right out of the ice box.
Swearing Mom out.
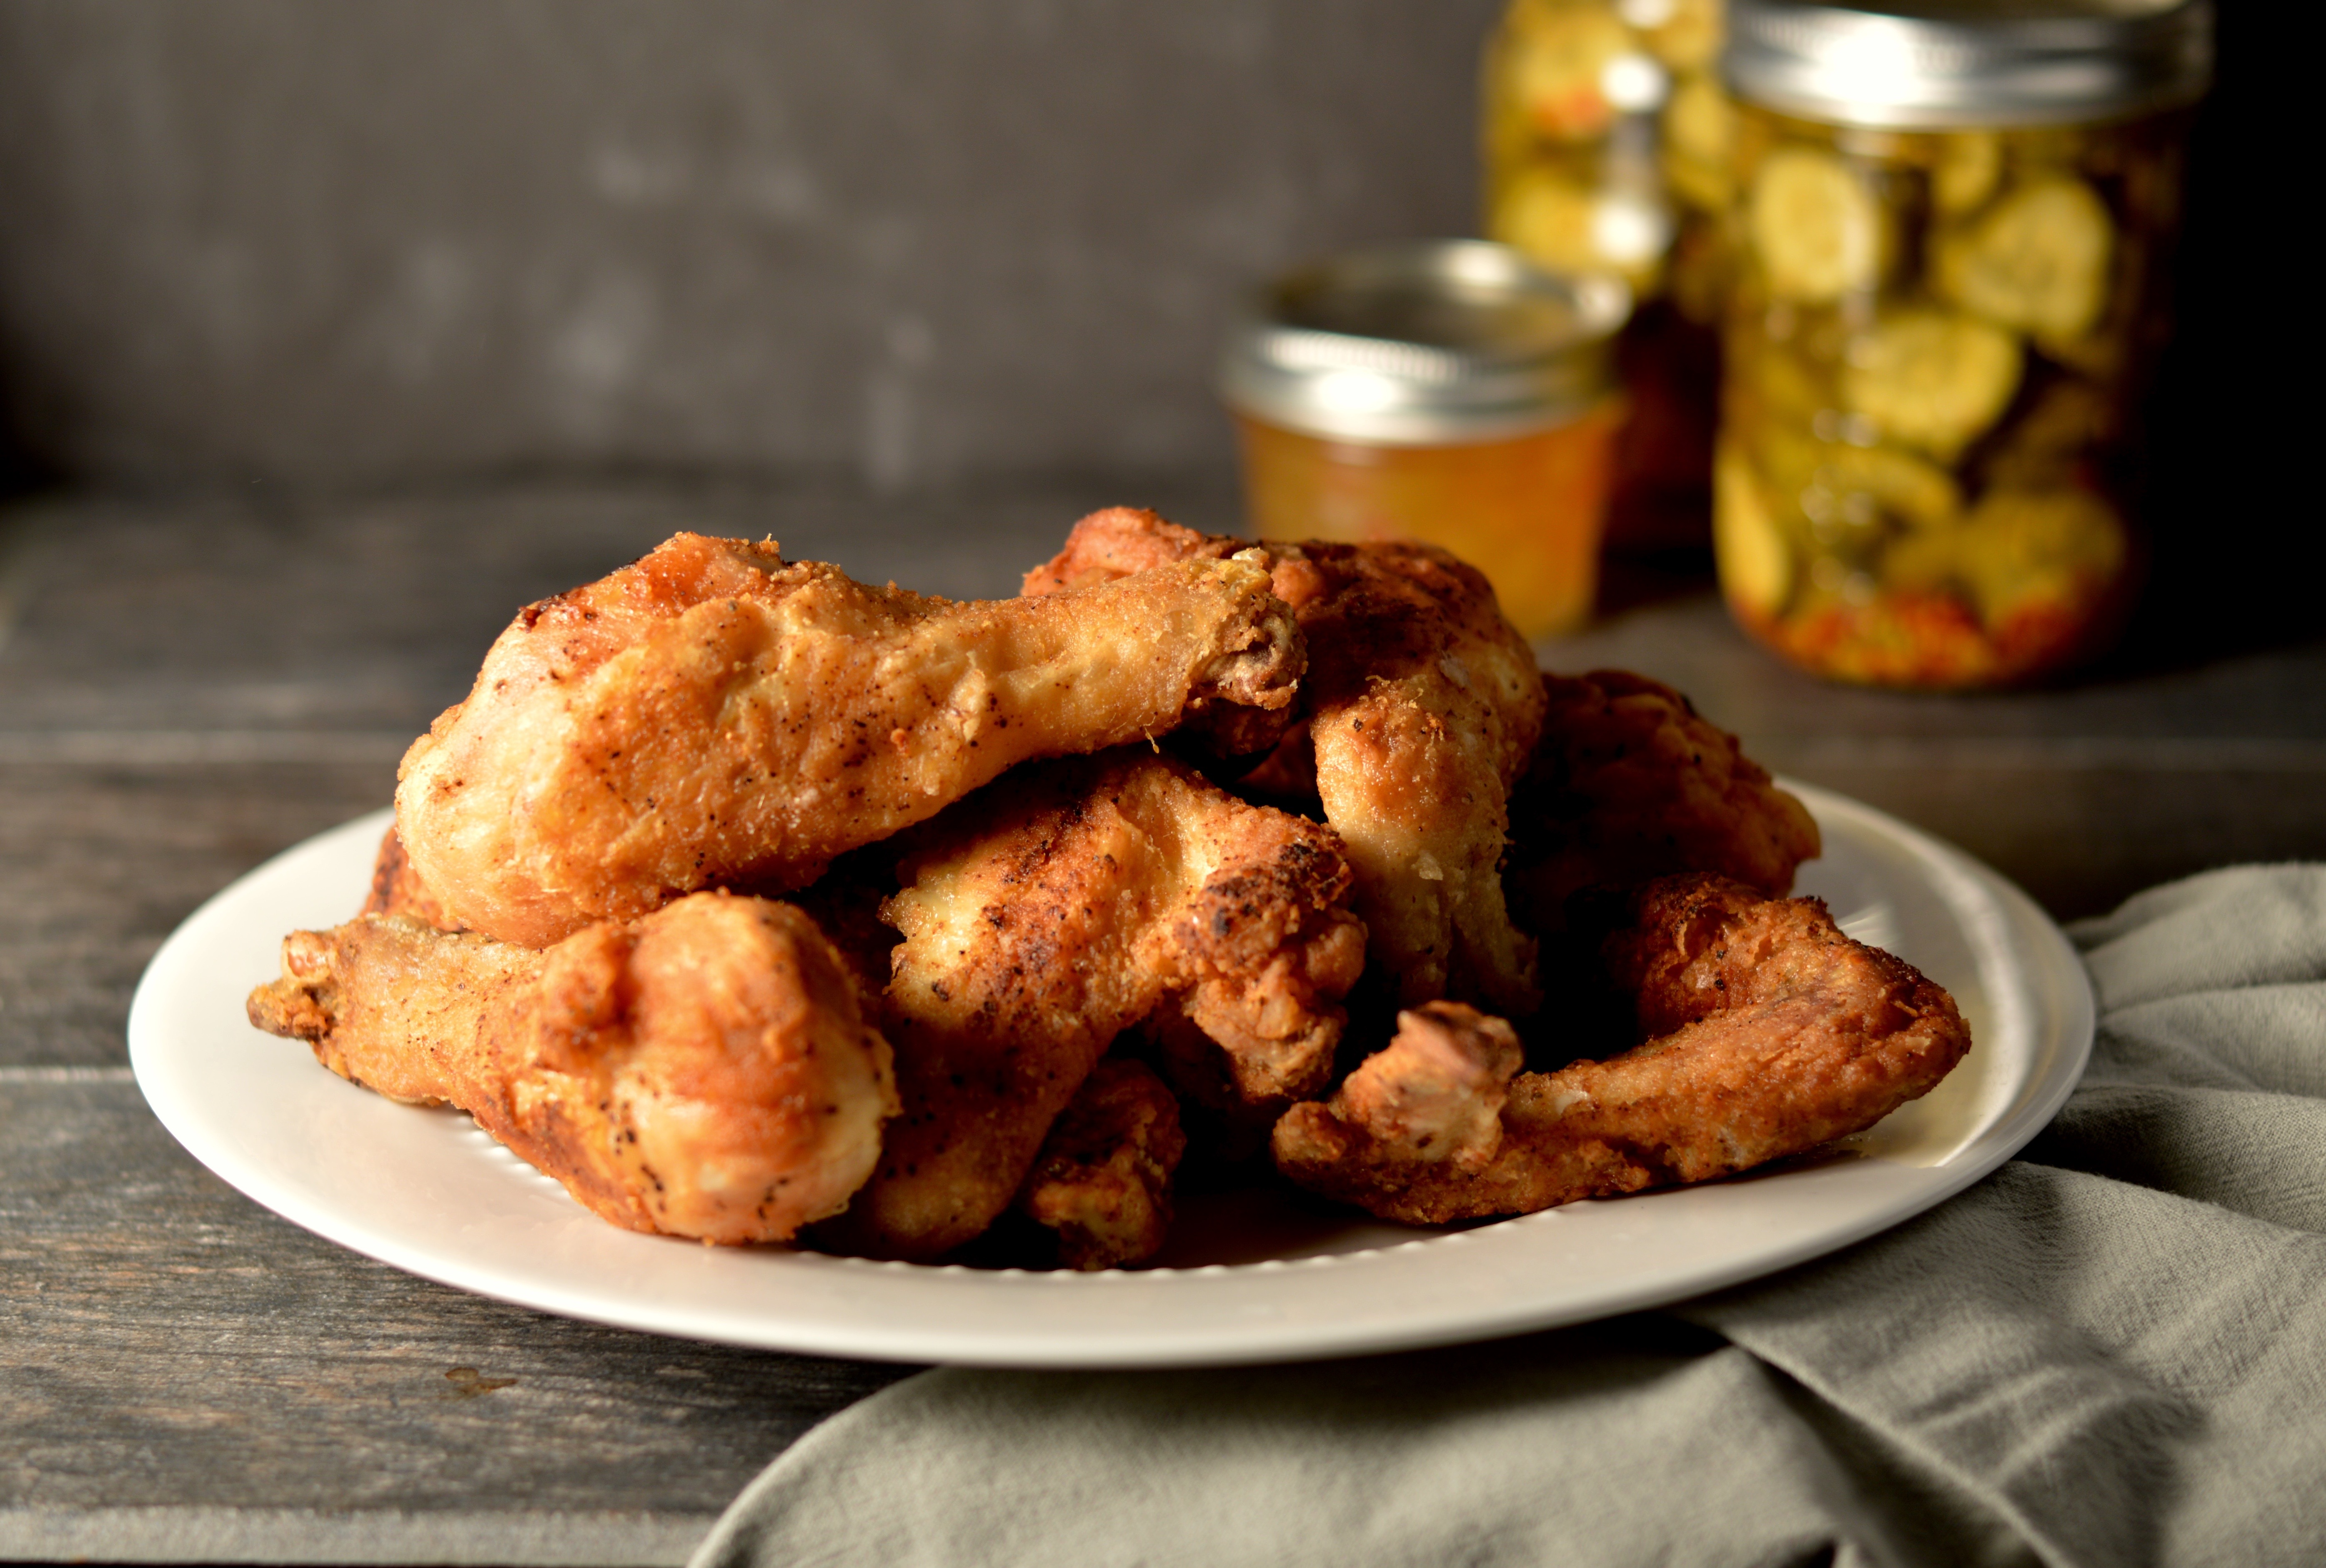
PS, I’d like to add one caveat… we had unexpected guests and I did not take as many pictures as I would have liked. The color of the chicken in the plated photo is what you’re going for. You want that golden crust BEFORE you turn the chicken.
